Monday, June 30, 2014

Oobleck, or Red Goo

Due to my camera not working properly the first time around, I decided to make it again. This time with Brianna. I am watching Brianna today and she graciously helped me recreate the project! Thanks!

This is a classic experiment in colloids.


Goo Recipe:
 
1 cup cornstarch
1/2 cup water
Food color
 
1. Pour corn starch into a mixing bowl.
2. Pour water into cornstarch. You can add the food color into the water, or for mixing fun add it into the mixture after mixing.
3. Mix together with your hands!
4. Have fun!
 
 
Brianna poured it the cornstarch into the bowl. At this point she felt the cornstarch to see what it felt like. I explained what cornstarch was and how it is used to thicken sauces. I also asked her to make a prediction on what would happen. Her hypothesis was it would get thicker.
 

As she was mixing it she realized it was thicker, but also kind of weird. We had an extra cup of water and some napkins handy to clean our hands if needed.


It got thicker and would run like goo, but also got very hard if you moved it too quickly.


First, I had Brianna poke the water in our cup to see how it reacted when she poked it fast and then again when slow. With the water the biggest difference was if you poked it slow the water was more calm than if you poked it fast and it splashed.

I then had her poke the goo quickly and none of it got on her finger. It became a solid when she poked it fast. However, if she poked it slowly her fingers sank like it was liquid, and in turn got covered in goo!

I then explained to her why this happened.

EXPLAINATION:

This mixture is called a colloid. A colloid is a when the solid particles, or tiny pieces, of a substance are suspended, or floating, in another substance. The mixture became hard because when moving through it quickly the particles collide with each other and cause a back up. When you move through it slowly the particles have time to readjust and move more smoothly. It's state of being is pressure sensitive; solid or liquid.

Some other examples of colloids include are:
fog = water suspended in air
mud = dirt suspended in water
quicksand = sand suspended in water
milk = milk fat suspended in a water-based liquid

I explained that like thick mud if you get your foot stuck in it and move too quickly your shoe will come off and be stuck but the slower you move your shoe should come out but you will be very messy!

When I did this with Gabriel we also used a workbook we had picked up in the dollar bins at Target a while ago.


It is a way to add some other activities with the experiment. It had a place for him to write his prediction and basic instructions for making it. Then it had a basic explanation also. I added to it's information above though.


Beware where you do this or prepare by covering your surfaces. It get's kind of messy. The good part is it is also very easy to clean off of hard surfaces. Just use a rag with water and rub it off slowly.

Thank you to Brianna for helping me recreate this and for helping me word this post!

Next up we are going to make some Kool-aid taffy after we go pick up Gabee! See you then!


Grand Total = $1 for a box of cornstarch

Sunday, June 29, 2014

Modeling Chocolate

With much disappointment this is the only of 3 posts I can make that I was going to because for some reason all the photos I took of making light sabers and Blue Goo aren't on my memory card. Like I ran out of film or something. BOOOOOO camera, BOO! Now I am going to pull out my handy dandy user guide and see what happened.

For Gabee's birthday he decided he wanted Star Wars Brownie cup cakes. As an attempt to see if I could make and use modeling chocolate instead of fondant on an up coming baby shower cake I am making I decided to experiment with modeling chocolate on these cup cakes!

I dislike fondant. Yeah, it's fun to use but it tastes horrible. What is the point of having a pretty cake if it tastes bad? I normally just use butter cream for everything.


Modeling Chocolate

2 cups (12 oz) white chocolate
1/3 + corn syrup

1. In a microwave safe bowl heat chocolate for 20-30 sec intervals until melted. Stir in between heating. DO NOT OVERCOOK! If you cook it too long you run the chance of scorching the chocolate and then it's no good for this.
2. In a separate bowl, heat corn syrup for 15-30 seconds until warm, not hot. If it is too warm to touch pop it in the freezer for a few minutes. Yet again if it is too hot you run the risk of scorching the chocolate then it's no good.
3. Pour corn syrup over chocolate and stir until just blended.
4. Pour our onto plastic wrap and flatten into a patty. Cover with more plastic wrap and seal tightly.
5. Place on flat surface and let set for 1-3 hours.


It is really easy to make and taste soooooooo much better than fondant.

For this I used Wilton's Candy Melts. It works out well because depending on the chocolate you use getting 2 cups might not be very accurate measure. Going by weight is a sure bet. Wilton's Candy Melts come in 12 oz bags! I used slightly less than 1/3 cup of corn syrup and mixed it until blended. Once you have mixed both together it starts to set pretty quickly and gets a fluffy consistency going on. I covered mine with plastic wrap and left to sit on a cookie sheet for 3 hours.

When I pulled it out it was rather hard and I thought I had done something wrong. I was wrong about being wrong though. Knead it for a minute and I becomes very smooth and pliable.

To make colors I used both liquid and gel food color and didn't see much of a difference between using either. I simply added a small amount of cornstarch to take away some of the moisture the coloring was adding to the chocolate. Knead in the color until it's uniform and the desired shade. If it's too dark add a bit of the left over white into until you get the color you're looking for.

It does become VERY soft when you knead it and might need a little bit of setting time again before you can really work with it. It also get's VERY shiny while you are working with it. After setting again however it turns pretty matte and firm.

All the left over dough I had left I simply rolled up with the plastic wrap and put it in the freezer to use again when needed. It is said to have a freezer life of over a year if sealed well.

Here were our 10 minute cupcake decorations!


Since I was rushing to make these I didn't really knock out much detail or let them set. Especially for the light sabers it would have been a good thing to do as they warped once I put them on. Later they were nice and firm and held their shape wonderfully, by that point it was too late though. Moral of the story take your time.


Not gorgeous but we had fun making them and I am now pretty confident that it is perfect for the baby shower cake. When I do that I will actually take my time.

Grand total for modeling chocolate = $3

Off to fix my camera. Tomorrow we are making Kool-aid Taffy. Join us for that!

Saturday, June 28, 2014

Late Indoor fun fort!!

I forgot to post! Oops! It's been crazy this weekend. Gabee's birthday was yesterday and with 3 families to accommodate for birthday celebrations it sometimes gets hectic and I am behind schedule. So, a few changes got made this weekend. Friday Gabee didn't want to do the science experiments and I am just letting them go because I apparently didn't read the instructions well enough for the star player and don't have the money for the ingredients. So we left it out and started again today. To catch up I will probably post three more things today! After Chuckee Cheese's. After Eli goes to sleep.

SOOOOOO, on with the show.

Thursday, we made a fort in the playroom out of a bunch of cardboard boxes, some cardboard tubes, some sheets, and some Christmas light.

We started by collecting boxes.

 
The we collected MORE boxes. I was really happy to come across the big box outside of 7-11 around the corner from my house. They were replacing the grill and this was the box it came in. I was super happy!
 
As you can see I had been saving diaper boxes, I reused the cardboard I had spray painted the golf hazards on, soda boxes, beer boxes, anything that I could that was semi sturdy.
 
 
I took one of the large boxes from 7-11 and took a screw driver to it. It was a very good release of aggression! I stabbed the box 100 time with the screw driver to make holes for the Christmas lights.
 
 
I asked Gabriel to take a picture of me poking the Christmas lights through the holes only to find about 90 pictures, mainly of Eli, like these when I checked my camera..... Thankfully we got one gem.
 
 
Word to the wise. Know your Christmas lights. I thought I was using the outdoor Christmas lights and had plenty of space between the lights. I did not. I ended up using two sets of lights because the lights I used only had about 4 inches of clearance between lights and wouldn't stretch between the holes. So I ended up poking more holes and adding more lights. I also used a box cutter to cut out and score a double door on the other side of the large box. One door feel off and we taped it on both sides to give it a hinge. It works well.
 
 
We added some decorative towers and two structural towers (I forgot to get pictures) You can kind of see them on the sides. They were composed of two diaper boxes each. An unopened box for weight and a empty box for height. Then I taped the think cardboard tubes on top of them in a way to add support to hold weight on top. You can see those making the ten structures on top. We then covered the top with a sheet and taped it to the two large end boxes.
 
 
This is an inside view of the support towers. I then added another think cardboard tube held between the two standing tubes to make a roof like support system. Let me clarify on the tubes. I have no clue where they came from my husband brought home a big box full of them one day from work. I believe they are tubes for mailing posters.
 
 
Finished fort. I just couldn't capture how awesome this thing is in pictures.
 

That's the side so you can see the general structure.

 
Gabee decided it was a light saber factory and has been coloring the white tubes into light sabers for 2 days now.

Grand Total = FREE!

Next up, Modeling Chocolate, Pool Noodle Light Sabers, and Blue Goo!


Wednesday, June 25, 2014

Payday Candy Bars

Today's activity was a 'baking' project. I use baking very loosely as there was no actual baking happening here today.

The recipe was as follows: (Original is in red and crossed out, I changed it to better fit the results desired)

Salted Peanuts Caramel Bar

2  3 cups salted dry roaster peanuts
2  1 1/2 cups peanut butter chips
3 2 tablespoons and 3/4 teaspoon butter
1 (14 oz) 3/4 (10.5 oz) can sweetened evaporated milk
1 (10.5 oz) 1/2 - 3/4  bag mini marshmallows (depending on fluff level desired)
1  1/4 teaspoon salt (optional)

1. Heavily grease (make sure to get the sides!) a 9x13 8x11.5 baking dish with butter or cooking spray.
2. Spread 1 1 1/2 cup of peanuts in bottom of baking dish.
3. In microwave safe bowl, heat peanut butter chips and butter for 30 second intervals until melted. Stir between heatings.
4. Once melted, stir in salt and milk. Heat again for 1 minute.
5. Add Stir in marshmallows and combine until marshmallows are well coated. and heat for additional 30 seconds. Stir until smooth consistency is reached.
6. Pour mixture over peanuts and spread evenly in dish.
7. Top with 1 1 1/2 cup peanuts and lightly press down into mixture.
8. Refrigerate for 2 hours before cutting.
9. See bottom of the page for neat version.

It sounds simply enough. However some things were somehow different. We gathered all our ingredients.


Now there we had to use an 8x11.5 baking dish because my 9x13 is at my mother's house and I wasn't driving down there today. I guess it was a good thing to do since we needed more like 1 1/2 cups of peanuts to get good coverage of the bottom of the pan.


Gabee's favorite part is always pouring things into the bowl. So I let him do it all!


Peanut butter chips and butter. Then Microwaved. The problem here was the only kind of peanut butter chips I found at 3 different store was Reese's. Only when we were starting did I realize the bag stated there were approximately 1 2/3 cups of chips. It turned out being much closer to 1 1/2 cups.


We mixed in the milk and salt. Forgetting to minus about 1/4 from the rest of the ingredients since we were missing about 1/4 of the chips.


If you follow the directions exactly as stated, your mix should look like this.


However, I don't like marshmallows like this. Not in rocky road ice cream or anything else. So I decided to melt this mixture again for 30 seconds. Once I had stirred it well it was a nice consistency to pour. Over the peanuts it went.


Disregard me. Gabee really wanted to take a picture. I want you to see the consistency of the mix.


Once we were done spreading it on top of the peanuts we had to add more peanut to the top. Yet again it took more like 1 1/2 cups to get good coverage over the mix. Gabee proclaimed 'We used almost ALL the peanuts! I'll eat the rest!' then proceeded to devour the remaining 1/4 cup (or less) of the peanuts. We put it in the refrigerator and began the worst process with cooking, waiting.


We watch Despicable Me 2 to kill the time.


They were finally done and ready to eat!!! They look good. They were fairly easy to cut and get out of the pan. They probably would have been easier had I greased the sides of the pan. Not exactly Paydays though.


They were VERY soft. This was the result of me standing it up right on the paper towel. It arched over pretty quickly. They tasted way to fluffy and more of faintly peanut butter flavored marshmallow than peanut butter or caramel filling. If I make them again I think I am only going to add 1/2 a bag of marshmallows because I think even with the proper amount for the recipe they would still be too fluffy and marshmallow-y for my taste. They were also on the salty side, inside and out, so I'd lower or take out the salt completely.

The grand total on this also exceeded my $5 goal. They came in at $7.19

In short if I were to make them again I would change the following.

Salted Peanuts Caramel Bar

3 cups salted dry roaster peanuts
1 1/2 cups peanut butter chips
2 tablespoons and 3/4 teaspoon butter
3/4 (10.5 oz) can sweetened evaporated milk
1/2 - 3/4  bag mini marshmallows (depending on fluff level desired)
1/4 teaspoon salt (optional)

1. Heavily grease (make sure to get the sides!) a 8x11.5 baking dish with butter or cooking spray.
2. Spread 1 1/2 cup of peanuts in bottom of baking dish.
3. In microwave safe bowl, heat peanut butter chips and butter for 30 second intervals until melted. Stir between heatings.
4. Once melted, stir in salt and milk. Heat again for 1 minute.
5. Stir in marshmallows and heat for additional 30 seconds. Stir until smooth consistency is reached.
6. Pour mixture over peanuts and spread evenly in dish.
7. Top with 1 1/2 cup peanuts and lightly press down into mixture.
8. Refrigerate for 2 hours before cutting.

Well that's it for today. Tomorrow we are making a fort for the first time. Possibly making cupcakes too! (Friday is Gabee's 7th birthday!!!) Tata!

Tuesday, June 24, 2014

Backyard Mini Golf...

...or as I like to call it recyclable mini golf!

The goal here was to make a miniature golf course in the common area of our neighborhood out of recyclable things. I started with a table full of cereal boxes and empty food containers. The best part of this project was the grand total for making it was exactly $0. That's right FREE!

 
I cut them, and folded them, into tunnels and arches. Then painted them red with a can of old spray paint. I took the long white tubes from the picture above and cut two notches in the end and put a piece of stiff rectangle of cardboard between them to make some gold clubs.
 
 
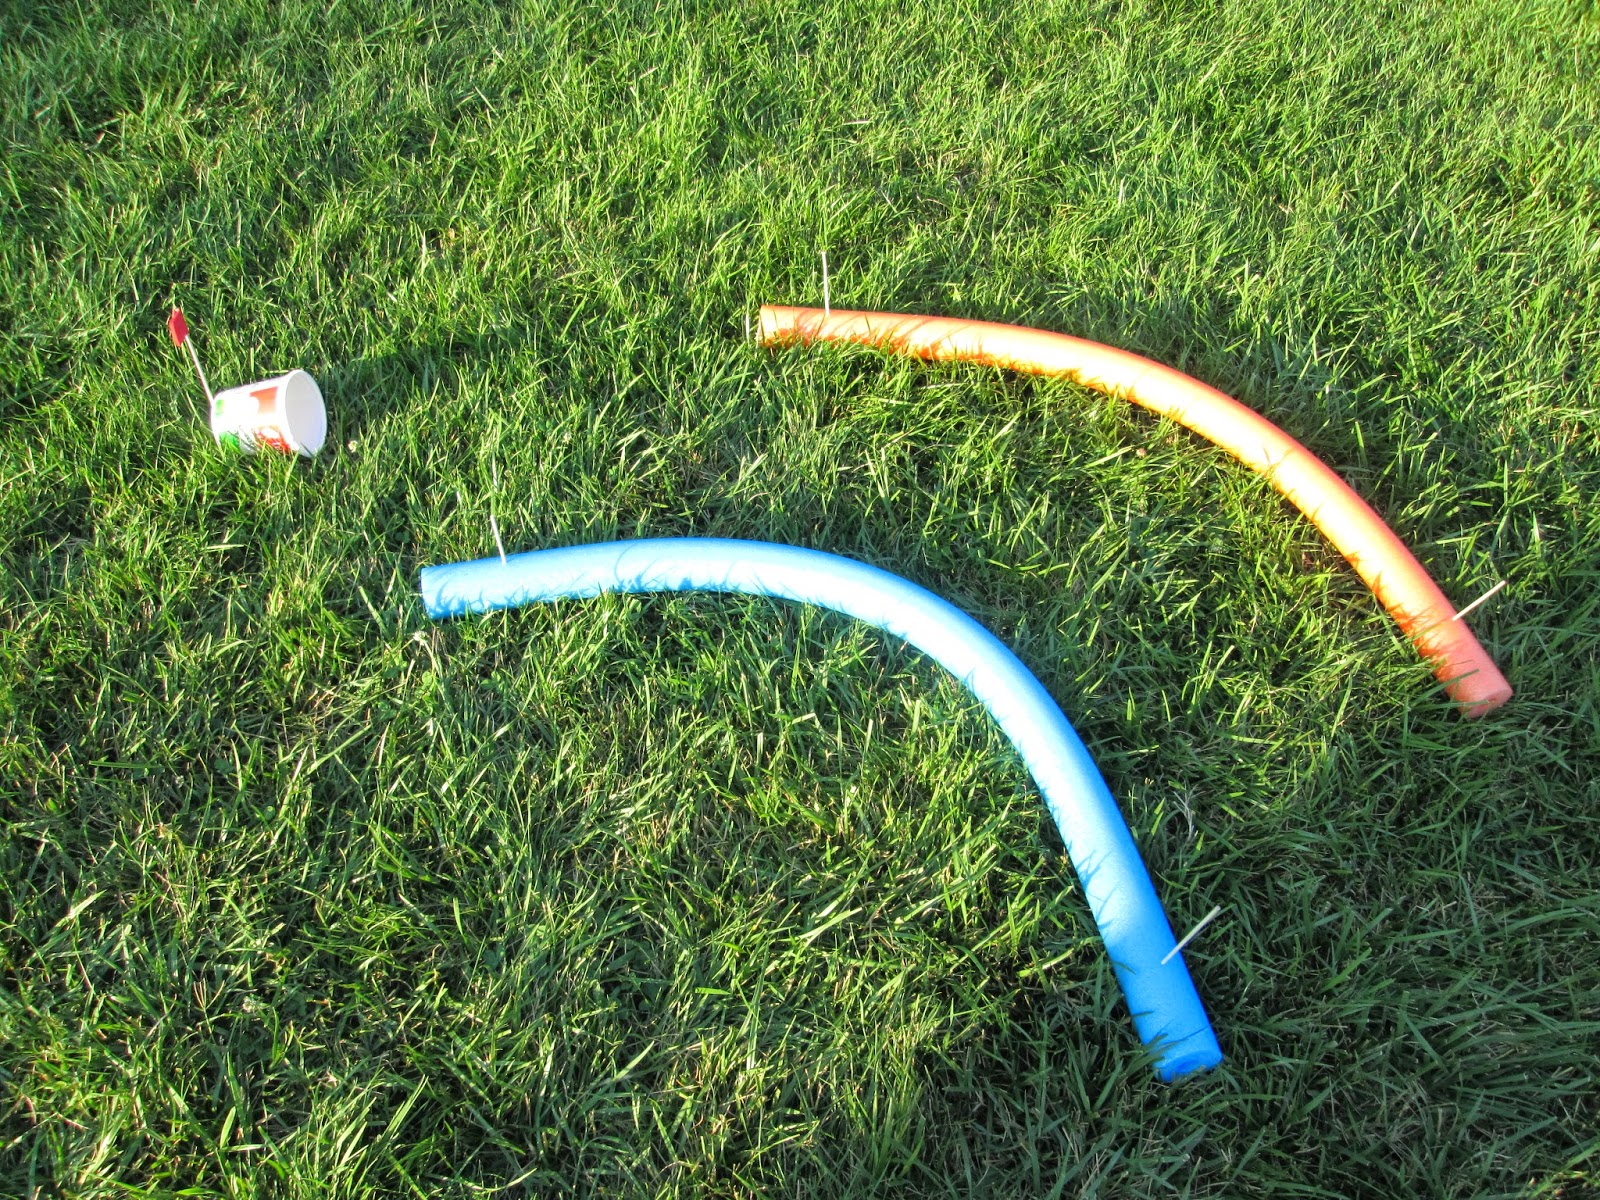
I added in a few of the toys we already had around the house. The multicolored baby ball funnel, as I like to call it, and some tracks from my son's Mario Kart Kinects set were both useful to make golf holes. I can't for the life of me remember what those things are called right now. Hazards? Traps? Contraptions? I can't think. Throw in some electrical tape and some dollar store pool noodles and we have a golf course. The key here is being creative and using things you already have.
 

Just for fun and to add a little order to the chaos that is children, I made little colored flags out of 12 inch bamboo kitchen skewers and sticky back foam sheets.

 
The balls we used came from various sets; from a real golf ball from my honey moon, to the colorful balls that go with the multicolored baby ball funnel. I also used the bamboo skewers to add support and hold things in place.


I used the skewers to hold noodles in the ground and empty cheese, yogurt, and bread crumb containers to make the 'holes.' The biggest problem we ran into was the grass hadn't been cut in a while so it was a bit hard to get the ball through the grass to the hole. If I were doing it at my own home I would recommend making sure the grass has just been cut before doing this.
 
 
However, we did this in the community common area in our neighborhood and set up quite a few holes on the cement basketball court and it was much easier there.
 
 
It was fun, more so for the youngest children. Also, most of these children had never played min golf before today. Eventually it turned into kids rolling the balls by hand and making ball launchers out of the tube golf clubs. Oh, the creativity of children far exceeds what I expected. It was also good to have my husband and younger son come out and say hello.
 
 
Grand Total = FREE!
 
Tune in tomorrow to make Payday Candy Bars with us!


Monday, June 23, 2014

Nature Scavenger Hunt

Today was day one of activities and I was quite pleased! We had a bigger turn out than I expected since I hadn't told anyone but a friend who was coming. I ended up having about 12 kids participating in the hunt. I didn't get nearly enough pictures as I was helping one of the smaller participants since she couldn't read.

What I did was make up a fun scavenger hunt list. You can get the list here.  I made it two on one page to save paper since I was anticipating at least 4 kids.

Then I took out the pack of markers I had bought for a later project and gave each kid a marker and a list. I also gave them all a brown paper lunch bag to hold their finds since I had them on hand, but reusing a plastic shopping bag would work nice too. I then stapled their lists to their bags and off we went in search of nature.


We stayed together as a group since we were going near the woods and I was the only adult. The amount of team work that came out of the kids was surprising. They were much less competitive than I expected.

 
The older and taller kids were helping the smaller and younger kids get things from up in trees that they couldn't get themselves. Here they were getting berries.


I was also amazed that with a little searching every child found a feather, including this fantastic specimen.

 
All in all the kids had a great time. The team that had finished first gets mini candy bars if they come back for mini golf tomorrow.


The girls got a special treat after the scavenger hunt. I was watching them until their mom came home and we had a girls vs. boys Nerf Gun war. It was exhausting and fun!

 
Grand Total = FREE!
 
 
That's all until tomorrow's mini golf championship. Better pictures tomorrow. I'm new to this whole remembering there is a camera to use stuff.

The lists

I am putting up the cards that you may download or print out if you'd like and  I am also putting up the supply list I am using for this summer.

Forewarning about the cards; while they all have a supply list on them, some of them do not have instructions as they would be too long to fit on the cards. Some of the cards might not make much sense seeing as I put down the instructions in ways I understand. Everyone has their own way of writing things that they can understand. If this is the case you'll have to wait until I go into detail on them the day they are chosen. Also, I left some blank cards in there so you may add whatever you would like to your list. 

You may get the cards here.

A few words about the supply list. The list is not separated by activity since many of the activities require the same supplies. The list is for everything you will need for all the cards in the document above.

You may get the supply list (conveniently made into a shopping list) here.

Some things might be missing from the list as I already have them and forgot to add them.


Thursday, June 19, 2014

The set up

It's finally over! School is out for the summer! Now we begin the real fun!

Over the past few days I have been preparing for this summer's activities. I took some prep time to make a board for organizing a week of activities at a time, for shopping and organizing ease. I also made cards with all the activities, and recipes with ingredients and instructions for each.

To make the board I simply reused a board we already had and would no longer be using. It was a clip board we turned into a dry erase after school task board. I made it so we could change it when needed so everything was easily removable. I removed the clear plastic and stickers. Painted some clothes pins and glued them to the board.


Next I printed and cut out the cards I had made for all the activities. I added in a few extra cards when making them to include activities for me to do while Gabee is at family member's homes. I also added an eighth pin at the bottom right corner for a weekly task of working toward a belt loop to for Cub Scouts.


After I cut out the cards I folded them and put them in an old formula tub I had saved. When Gabee got home from his last day of school I had him draw cards from the tub for the next seven days.


As he drew cards we clipped them to the board. I added the 'mom tasks' at the top of the clip board. It includes such things as 'Put the wallpaper border up in the nursery' and 'Organize craft table' along with other tasks I need to finish around the house for when Gabee is out of town. We then hung the board at his command center on his play room wall. This week's chosen activities are:  
 Nature Scavenger Hunt
Backyard Mini golf
Payday Candy Bars
 Build a Fort
 Nature Science Experiments
 Oobleck (or Blue Goo)
 Lightening Bugs
 
The Cub Scout Belt Loop we will be working on is the Science loop.


We can't start until Monday since Gabee will be visiting his father this weekend, so we are going to go shopping tomorrow and I will prepare Monday's activity this weekend. Stay tuned for more fun! This weekend I will try to get a downloadable version of the cards up for anyone that wants to join in the fun.