Tuesday, July 15, 2014

Silky Soft Dough

 I am going to apologize now for the quality and lack of pictures for this post. We were fresh from the hospital with my father having a heart attack and I was on the phone with various family members for most of this project.

This is silky soft dough. It smells fantastic and is actually a very pleasant texture to touch. It has the consistency of play dough but it sooooo soft. I wanted to just sit there squeezing it, which I did while I was on the phone.
 
Silky Soft Dough
1 cup of cheap dollar store hair conditioner (pick a scent you like!)
2 1/2 cups cornstarch
 
1. Mix together until if forms a dough.
2. Turn out onto lightly corn starched surface and kneed until well mixed and firm.
 
 
Gabee mixed the ingredients together and originally mixed them with his rubber scraper but eventually it was time to get your hands dirty and really squish it together. Ours needed a little bit of tweaking after mixing as it wasn't coming together quite right. It was very dry and crumbly. So a little squirt at a time we added more and more conditioner until it was a nice pliable dough. We added a little too much conditioner and had to add a bit more cornstarch at a time too. If you have a hand held pastry blender this would be a great use of it. I also considered just throwing it in my Kitchen Aid stand mixer and letting it mix but lack of hands and distractions I figured it would keep him busy for a few more minutes while I chatted.
 
 
We turned it out into a cake pan lightly coated with cornstarch as it still seemed a little sticky and I didn't want it on my table and I no longer trust wax paper after the slime incident.We pulled out some sand toys and corn starched the insides of them before filling them with dough. They were a bit tricky to get the dough back out of but with a bit of squeezing and knocking on the table it all came out whole.
 

Gabee made a town with a fort, 2 castles, a church in the middle, and some odd round cars and homes for the aliens. Yeah,  he is most definitely my child.
 
 
He then used his fingers as a giant and smashed down the whole town to start again. Elijah protested this but went unheard by the council. While the pictures don't do it justice it was fun soft and a bit messy. It ended up all over the floor and the chair cushion is now mostly white. So make sure the area it is to be played with in is prepared for some mess.
 
We stored it in a cottage cheese container with a lid and it is not drying out at all. I know because I keep opening it just to poke it and feel it again. I'm sure it would be fine in a ziplock bag with the air pushed out also.
 
For some reason it just now came to me that we could have probably tried to color this with food color. Gel food color would probably be better but I bet it would work. Maybe I will try to color some at a different time.
 
Grand Total = $2 

Sun Catchers

What better was to liven up a window than adding some color? That's exactly what we did for the playroom window. We made a colorful sun catcher! I have also seen these used to make serving stands for cakes, cupcakes, or appetizers buy gluing a glass candle holder to the bottom of the main circle below.


The supplies for making sun catchers
Pony Beads
A metal pans in the shape you desire
An electric drill
yarn, or string


Plan out what you would like to do with your sun catcher. We decided a large circle with 4 dangling sun catcher was what we wanted. I told Gabee he could draw a picture with the beads. He originally wanted to make Jedi fighting with X-wings flying in the background. Then I informed him he needed to fill the whole pan, he gave up and filled the whole pan with all the colors. His patience is not the greatest. I wanted willy-nilly colors thrown together but I was more specific about some of mine. I wanted only pink, purple, and a few red and orange.

We used a muffin tin to make the dangles and an eight inch round cake pan to make the main piece. Make sure you are not using pans you plan to use again for cooking as after baking I was left with a thin plastic ring around the tins where the top of the beads cooled and popped off.

When you are filling the pans make sure to only fill it 1 bead deep. No beads sitting on top of other beads or it will lead to interesting overlapping colors. While you are designing your color patterns, preheat the oven to 400 degrees.


We popped them in the oven and waited. It took about 10 minutes for them to melt down and as you can see it had started to bubble a bit. I don't know if this was because I left them in slightly too long or were bubbles left over from the beads.

 
Probably because I left them in a bit too long as the entire main level of my house smelled of burned plastic and my kitchen got quite smoky. (EDIT: A friend of mine informed me that they ALWAYS smell horrible no matter how long you cook them. You have been warned!!) I opened a window and turned on the fan but be prepared for this outcome. They, as you see above, are not burned even a little. Now just wait until they cool and they pop out easily from the pan. While they are cooling you might hear loud pops and cracking. I had to keep checking on ours because I thought they had shattered and exploded in my kitchen. It took about 30 minutes before we could pop them out.

 
Next we had to drill holes in them. Learned more lessons. Maybe it was just me and my drill bits are old and worn but it wasn't so much drilling as melting a hole through the plastic by sheer friction. Make sure you have a good grip on the plastic because if you don't a few seconds after the drill makes it through the plastic the plastic will harden around the drill and then you have a cracked colored plastic disk. The plastic got stuck to the end of my drill and hardened there quickly after pulling it out of the disks.
 

I used a pair of wire cutters to snap it off. On a few of them it took a little bit more wiggling and cutting but the drill bit is as clean today as it was before I started this project.

 
After drilling the holes we used some plastic/nylon type rope used for making key chains to attach everything together. We tied a knot at one end slipped in through both holes and tied another knot at the end to hold it in place.


Not the greatest picture as it was about to storm but you get the idea.

Grand Total = $6

 It would have been cheaper but I bought the big container of beads for $5 thinking I was going to have more children over to make them. If you look at the second picture up top you will see the container is almost empty but that is the second batch we made for a picture since I forgot to take one before we baked them. I bought  a cake pan at the dollar store and used and old muffin tin I had already.

Pool Noodle Light Sabers

Due to Gabee not being at home for a while, being out of town, family stuff, and my father having a heart attack I have not posted in a while. I have plenty to post as we have still done some things but sitting down and actually writing it out has just not happened lately. Not only have we been trying to continue on with new projects but also catching up on the ones we have missed. We have 2 more from last week to finish up. So here it goes. I first of the posts we have completed.

I first thing to catch up on is the Pool Noodle Light Sabers we had made on Gabee's birthday. This was among the things that my camera didn't seem to work while taking the pictures. So, we made another one more for blogging purposes.


The materials needed are:
Pool Noodles in desired colors
A bread knife
Duct Tape
Electrical Tape
Scissors

This was probably the simplest project we have done.

The first step is to decide if you want a Bo staff Light Saber (light Darth Maul's) or regular sword Light Sabers. We did both but only have pictures of the Bo staff. This were originally intended as party favors for Gabee's birthday party but we ended up not having a party so now they are just toys to take to the park that the kids can whack each other without hurting everyone (I've caught them too many times running around with tree branches hitting each other!) 

You can find the pool noodles at the dollar store for a dollar each. I got 8, I believe, because they are great to have around not only for this project but for baby proofing, baby water toys if you cut them up, and for making wreaths. Wreath making is my newest hobby.


Anyways, you would start by cutting the noodles in half with the bread knife to make normal sword Light Sabers. With a Bo staff skip that step and go straight to cutting duct tape to a length that will wrap around the noodle. It worked much easier to cut the tape into strips rather than just wrapping it around the noodle. It was neater and gave us much straighter lines.

 
Then just wrap it around in sections until you have a handle as long as you want it. As you can see on Gabee's shirt he likes stickers. It doesn't matter if that sticker is the manufacture's sticker he will put it on him. I used to do that with gift bows on my head. Still do most of the time.
 
 
Once you get the handle you like, cut out strips of electrical tape and make a design that pleases you. Gabee wanted a lot of buttons so we cut up loads of little squares that were distributed all around the handle. Be as intricate or simple as you'd like. Your little wannabe Jedi is unique so should be their Light Saber.
 
 
Grand Total = $3 for 4 Light Sabers and one Bo Staff
 
I already had all the tapes, scissors, knife in my craft bar so price will increase if starting from scratch.

Wednesday, July 2, 2014

Slime/Gak (and cleaning it off of surfaces)

This was an interesting learning experience on a few fronts. First we learned how to make something cool.  Then we learned how to clean that cool thing off of surfaces, the ceiling for example.


Slime/Gak

5 oz (1/3c + 1/4c + 1 tbsp) of white school glue
1/4 - 3/4 cup liquid laundry starch
food color
glitter (if desired)

1. Pour glue into a bowl and mix in food color until desired color is reached. Add in glitter.
2. Pour in small amounts of liquid starch at a time and stir well. Keep adding starch until it is firm enough to pull out and knead.
3. Lightly coat baking sheet or plastic container with room to knead it with a small amount of liquid starch. Pour slime into container and knead, adding in more starch until desired consistency is reached.


Starting off I didn't know that they made laundry starch in a non aerosol industrial sized bottle! Now, I do. I found this bottle of STA-FLO in the laundry detergent aisle at Wal-Mart for $2.50. Each bottle I had of glue was originally 7.? ounces (I can't remember how much the .something was) and I had 1 and slightly less than half a bottles. Hence why I figured out the measurements above. Supposedly, you can get a 5 oz bottle of glue but I didn't find any at the store. That red bin is full of most of my glitter. I like glitter.

 
The kids had a bit of trouble pouring the glue from the measuring cups so I assisted with spooning out the remaining. Don't mind too much if there is still a bunch of glue stuck in there, get out as much as you can and move on. If you're anything like me this will be difficult as I have a special spatula I use to make sure every single bit I can get out of a bowl gets out. Spoons don't work as well as rubber spatulas. 

There was a LOT of stirring going on. First trying to get the color dark enough and to get it consistently through the glue. Brianna wanted hers REALLY blue, as she was saying here.


Gabee's was red with green, orange, and white glitter. Brianna wanted blue slime with red and purple glitter. It took a bit of glitter to get the desired effect. We found out courser glitter works better, not the really large kind more of a medium sized glitter as the finer glitters didn't show up as well. We used probably a tablespoon or more glitter for each cup of slime.
 
I helped the kids by pouring in the starch while they stirred. I poured in 1/4 cup and then 1/8 cup increments after that until we got to a point where it was holding together and hard to stir with a spoon. Then I made my first mistake. I over estimate how well it was holding together and over estimated the non stick abilities of wax paper.
 
 
After realizing my mistake I quickly tried to get it back up but we lost some slime and made a huge mess trying to get it off the paper. It stuck to the paper and we ended up ripping it a lot.
 
 
I grabbed an 8x8 non stick pan and a plastic container from IKEA and added a bit of liquid starch before putting the slime on the surfaces of the containers. This worked SOOO much better. It barely stuck to the containers and what did stick was much easier to get off. They kneaded it more and more adding in about a tablespoon more liquid starch at a time. Watch your kids though. Gabee started saying his arm was burning once he was touching the liquid starch directly. I had him go was his arms well with soap and water and I resumed kneading his slime.
 
 
After it was all kneaded and to a good consistency Gabee had no problem playing with it. No more burning. Brianna's was a bit stiffer and less sticky than Gabee's. Both were good but when it comes to the consistency of the slime the more liquid starch you add the stiffer it will get. Imagine that laundry starch making things stiff. Whodathunkit?

 
They played with it for quite with it. I'd say it held the most attention of the projects I have done this summer so far.

 
This is a close up of the glitter mixed into Brianna's slime, Gabee's was hard to get a picture of the right color or the glitter because the lighting in my dining room is not so great and the glitter was light.
 
 
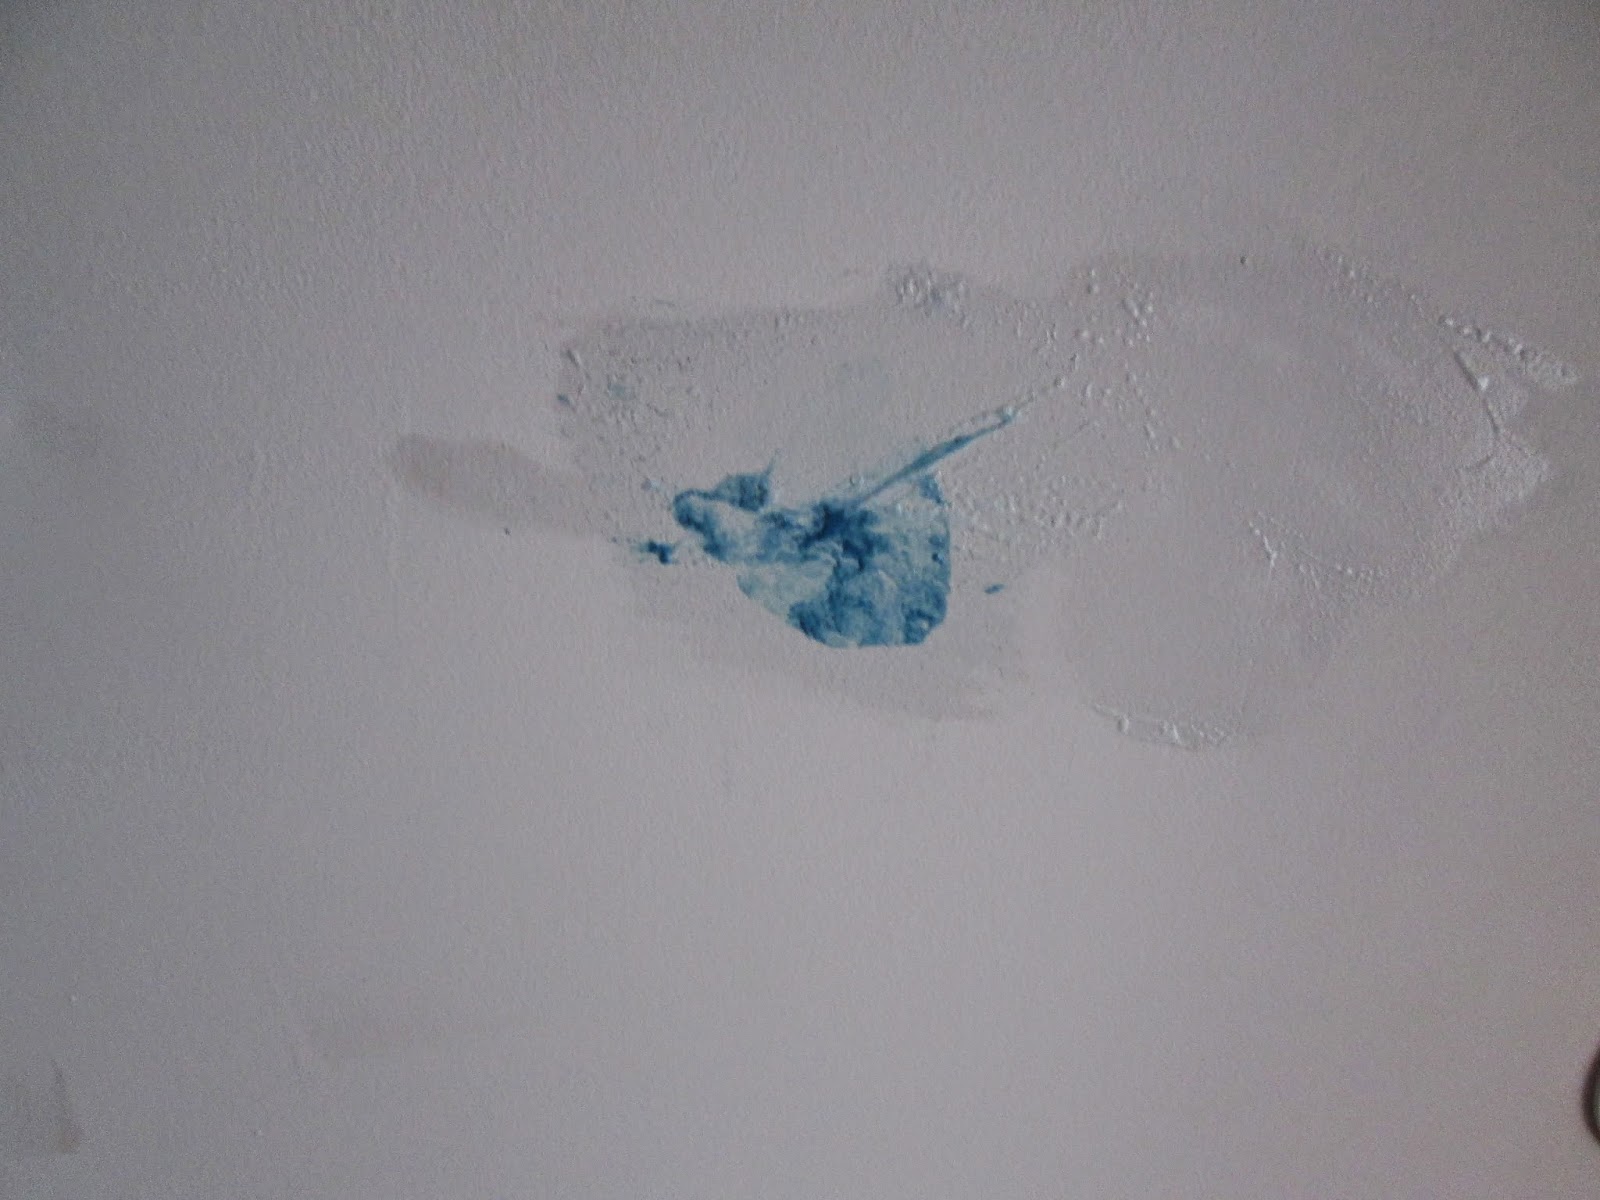
Then came the second mistake. I was unware I needed to tell the kids not to throw the slime and while I was out of sight they were apparently throwing it in the living room and when I reentered the room I found Brianna on a chair trying to reach the slime that was still stuck to the ceiling. Since she couldn't reach it, she was instead trying to catch the small bead of slime falling to the floor. Thankfully she caught them all. I took my metal spatula for making cupcakes and got off as much as I could.

Then using a damp sponge with a little bit of soap I started slowly wiping the slime. After a few minutes it started to roll up and come off onto the sponge. With a bit more scrubbing it eventually all came off.

It did leave a slight blue tint in the generally area of cleaning, but wiping it down again with water while the ceiling was still wet got rid of that. It has now dried and you can't tell we ever had blue slime stuck on the ceiling.

Gabee also got some on the rug. I picked out as much as I could and then scrubbed really hard with the sponge and most of it came out but the white stripes in our rug are still tinted slightly pinkish red. Try to avoid getting it on cloth surfaces all together.

Grand Total = $5 to make 2 batches for me. I already had food color and glitter though so the price will increase if you are starting with nothing.


Kool-Aid Taffy

This was, in my opinion the coolest thing I have done this summer so far. This was my first time making taffy and I am excited to try it again!


Kool-Aid Taffy

2 1/2 cups sugar
3 tablespoon cornstarch
1 cup corn syrup
1 1/3 cup water
2 tablespoons butter (+ the rest of a stick for hands)
1 pack of Kool-Aid in desired flavor
1 teaspoon salt
1 teaspoon vanilla

Other helpful supply: candy thermometer (If you don't have one you can pick one up at Walmart for about $4

1. Butter a cookie sheet. The larger and shallower the better. Make sure to cover the pan and the sides.
2. In a LARGE pan mix sugar and cornstarch. Then add in the corn syrup, water, salt, and butter. Stir well.
3. Bring to a boil over medium heat. Once it starts boiling STOP STIRRING! Let it boil until it reaches 250 degrees on a candy thermometer. REMOVE FROM HEAT!
4. Stir in Kool-Aid and salt. Stir very well.
5. Pour out into the buttered pan you made earlier. Let this sit until cool enough to be handled.
6. Once cooled, butter hands well and begin to pull and twist. Fold over and do again for 10-15 minutes.
7. Pull into long rope and cut into small pieces with buttered scissors.
8. Wrap the cut pieces in wax paper.
9. Enjoy!

I let the kids do most of the work on this one. Except the waiting. Kids don't like waiting so they played toss the penguin bean bag while I waited and watched.


They added everything into the pan. Be careful not to stir the sugar/cornstarch mix too quickly. Brianna is an enthusiastic stirrer and we ended up with a cloud of fine powder encroaching on the kitchen.

Once it started to boil I had them go butter the pan. I told them to paint it on thick until the whole pan was covered including the sides.


You know how they say 'a watched pot never boils', well this is VERY true when it comes to watching  a candy thermometer rise. I have some, but not a lot, experience using my candy thermometer. I don't have enough to know how fast something will get to temperature. After watching this for around 15 minutes and it slowly creeping to 220 degrees I figured I had about 10 minutes more. I am lumping myself in the children and took a break from the waiting game. I walked away for 5 minutes and it was almost to 260 degrees. Oops! I figured it hadn't made it to 'hard ball' stage so we would continue anyway! So it took somewhere in the 15-20 minute range to reach the desired temperature.


They chose Sharkleberry Fin flavored Kool-Aid (I was rooting for watermelon or cherry.) It is, I am assuming from the picture on the front of it, orange strawberry banana.


It took about 35 minutes to get the candy mixture to a temperature I felt the children could handle. It might take more or less for you depending on the thickness of pan. Mine is a fairly small cookie sheet. It was coated with an oily butter film over most of it and therefore came out of the pan pretty easily. It did however stick in a few spots and then got solidified rock hard on my nails. It came off with water and some biting. The candy not the nail. Sooooo, anyway, I pulled it out and squashed it into a ball for the kids to start pulling.


They pulled....

...and pulled. For about 15 minutes they pulled. They had to rebutter their hands often. After this amount of time, and my repeats of not pulling it into 2 different balls. Theirs wasn't quite what it should look like. While the kids were pulling I had been cutting out about 4x4 inch square pieces of wax paper to wrap the candies in.

More uniformed pulling is what is needed. I took over for a few minutes and the went back to tossing the penguin. Seriously, they were really amused with tossing the penguin. For like hours.

I didn't get any pictures of what it should look like when pilling but pulling it into thin strings isn't the winner. I pulled it out as long as possible without getting too thin and then folded it back over itself and twisted it. Shampoo, rinse, repeat I did this for probably 10 minutes. You will know when it's gotten better because it will go from a translucent and darker to opaque and lighter. As an adult I was more mindful of the butter because the taffy refused to stick to itself very well after the kid had used so much butter. I tried to do it without any butter until I got it to a point where it was combining instead of sliding off itself.


I then pulled it out into a rope on some wax paper. It might be better to do this on a buttered cookie sheet of two as it did stick in a few places and ripped the paper into it. We didn't use these pieces.


The kids wrapped the candies. It works best if you form them into small balls or cubes by pressing them. I was giving them pieces that were about 1 inch by 1/2 inch or so. They were by no means uniform.


I used kitchen shears and made sure to butter them every 5 pieces or so to keep them from sticking to the scissors.

All in all we ended up with about 150 pieces of wrapped candy. This is after we removed some chucks due to paper stickage (wax paper and a large chuck I got a paper towel stuck to trying to remove butter after I dropped the end in the now soft stick of butter) and the one we ate. It would have probably been 200 or more if we had used all of it to wrap.

 Grand Total = Maybe around $4 in ingredients I already had on hand